
Season 2 Guide
The Ultimate Last War Survival Season 2 Guide: Polar Storm Tips, Rare Soil War, and Alliance Strategy
The complete Last War Survival Season 2 mega-guide: temperature survival and freeze rules, every heat source, High-heat Furnace and Titanium Alloy Factory data tables, Dig Site and City capture rules, the level unlock schedule, Mutant Beast counters, Rare Soil War phases and the Warlord Missile, the faction system, Nuclear Furnace, Glacieradon hunts, hero and exclusive weapon timelines, and the full Week 1 to Week 8 roadmap.
Last War Survival Season 2: Polar Storm is a very different season from the base game and from Season 1. Survival is no longer just about troop power and rally timing. The season revolves around temperature control, Virus Resistance, seasonal buildings, map expansion, alliance coordination, and the long-term race for Rare Soil and influence points.
Two facts change everything you learned in Season 1. First, scoring is now Rare Soil accumulated over time, not territory held at the end. Every hour your alliance owns a City or Dig Site adds to the final ranking, so the old 'rush at Week 8' strategy is dead — Week 1 ownership is worth more than Week 8 ownership. Second, cross-warzone captures are disabled. Season 2 is intra-server only, so your entire competitive field is the alliances you started the season with.
This Season 2 guide is the main overview article for the whole season. It combines the hard numbers — Furnace levels, Virus Resistance ladders, City output rates, unlock schedules, and war rules — with the strategic sequencing that decides who finishes on top. Use it as your season-long reference, then jump into the individual Week 1 to Week 8 guides when you need deeper detail for a specific week.
Key takeaways
- Rare Soil accumulated across the season decides the final alliance rank — capture Cities (350 to 1,000 Rare Soil per hour) and Dig Sites early, because every hour of ownership counts.
- Your High-heat Furnace is the single most important Season 2 building: it controls temperature survival and Virus Resistance, and every Titanium Alloy should go here first.
- Below -20°C for 5 minutes your base freezes — no rallies, no teleport. Stack heat sources: Furnace, Alliance Furnace, captured Cities, Tower of Victory, recon planes, and Firebomb.
- Unlock all four Titanium Alloy Factories before pushing any of them past Level 15 — four factories at Level 15 produce three times more than one factory at Level 20.
- Rare Soil War from Week 4 lets attackers plunder up to 20 percent of a defender's Rare Soil (30 percent after the Rare Soil Showdown), and the faction split in Week 3 decides who you can fight.
- Cross-warzone captures are disabled in Season 2, but Glacieradon hunts and the Warlord Missile prep window are two narrow cross-server exceptions worth exploiting.
Part 1: The Season Goal — Rare Soil Decides Everything
Season 2 is ultimately a race for influence points, and those influence points come from collecting Rare Soil. Alliances generate Rare Soil by conquering Cities and Dig Sites, and higher-level objectives produce more. The critical change from Season 1 is that ranking is based on Rare Soil accumulated over time, not on a snapshot of territory at the end of the season. Every hour of ownership adds to your total, which means early captures compound — an alliance that takes Cities in Week 1 banks weeks of extra income compared to one that waits.
The second layer of the goal is Rare Soil War. Passive production from Cities and Dig Sites gives steady seasonal income, but Rare Soil War from Week 4 onward creates the biggest swings because winning attackers plunder a percentage of the defender's accumulated stockpile. Alliances that understand both passive production and war timing pull ahead of alliances that only focus on random PvP or isolated growth.
The third rule that reshapes strategy is that Season 2 is intra-warzone only. There are no cross-warzone City or Dig Site captures, and foreign alliances that held outposts on your map in Season 1 lose them when the new map opens. Your entire fight is against the alliances physically present in your own warzone — so your diplomatic map, rival scouting, and defense pacts should all be built around the players you started the season with.
For individual players, this means your job is not just personal account growth. You want to grow in ways that help the alliance claim Dig Sites, hold Cities, keep furnaces active, survive blizzards, and win the major Rare Soil weeks. Season 2 rewards coordinated usefulness much more than solo stat chasing.
- Rare Soil is the real seasonal currency because it converts into alliance influence and better settlement rewards.
- Cities and Dig Sites are your passive production base, while Rare Soil War is your biggest swing mechanic.
- Season 2 is intra-warzone only — plan diplomacy and scouting around your own server's alliances.
- Judge every upgrade and daily decision by one question: does it help your alliance survive, expand, and collect more Rare Soil?
| Territory | Max Owned | Rare Soil Output | Season Role |
|---|---|---|---|
| City (Level 1) | 6 total | ~350 Rare Soil / hour | Passive drip plus heat radius |
| City (Level 6) | 6 total | ~1,000 Rare Soil / hour | Late-season income backbone |
| Dig Site | 4 total | Hourly Coal plus Rare Soil | Fuel for Furnaces and expansion |
| Rare Soil War win | Per war | Up to 20% of defender stockpile (30% after Showdown) | The biggest single score swing |
Part 2: The Temperature System and Freeze Rules
Temperature is Season 2's signature mechanic. Every base on the map has a temperature reading, and the polar climate is hostile by default: the map starts around -15°C at the edges and drops as low as -80°C near the Capitol. Your base temperature can never fall below the absolute floor of -270°C. The world map has a thermal view that shows server-wide temperatures — use it to plan how deep your alliance can push, because colder zones require pre-built heat capacity before you can operate there safely.
The cliff edge every player must respect is -20°C. If your base sits below -20°C for 5 minutes, it freezes: you cannot rally and you cannot teleport (alliance and random relocates still work), and debuffs apply. Falling below -20°C starts a 5-minute 'almost frozen' countdown — warm the base before the timer ends to prevent the freeze. Once frozen, raising the temperature back above -20°C starts a 5-minute defrost countdown, but if the temperature dips below -20°C for even one second during that window, the countdown restarts.
Two more thresholds matter for daily play. At 0°C, Supply Collection coordinates appear on the map — a free resource pickup route worth running whenever the weather allows. And warm bases receive general bonuses to resource production, troop durability, and morale, so staying comfortably above freezing is not just defensive, it is an economic advantage.
- Use the thermal map view to plan expansion depth before committing to cold zones.
- If you are close to frozen: relocate to warmer tiles, enable or Overdrive your Furnace, request Alliance Furnace Overdrive, or ask allies for Recon Planes and ice-breaking squads (5 hits at 5 stamina each).
- Enable the 'Auto-turn on Furnace in Blizzard' toggle so the game saves your base while you are offline.
| Threshold | Effect |
|---|---|
| Warm base (general) | Bonuses to resource production, troop durability, and morale |
| 0°C | Supply Collection coordinates appear on the map |
| Below -20°C for 5 minutes | FREEZE — cannot rally, cannot teleport, debuffs applied |
| Map edges | Around -15°C baseline |
| Capitol vicinity | Down to -80°C — extreme heat investment required |
| Absolute floor | Base temperature cannot drop below -270°C |
Part 3: Every Heat Source and How They Stack
Heat sources stack, and stacking them deliberately is how alliances operate in deep-cold zones. Your own High-heat Furnace is the foundation, but the single largest heat source on the map is a captured City, which projects a heat radius of 5°C at Level 1 up to 60°C at Level 6 for adjacent territory. Alliance Furnaces extend shared heat to members inside their radius, and allies can actively rescue each other with Recon Planes, Coal donations, and the Firebomb profession skill.
Plan around heat loss as well as heat gain: your base cools while troops are out of it, so long rallies into cold zones can leave you below the freeze line when your squads return. Time big pushes for warm windows, and pre-position heat before Blizzard and Cold Wave events rather than reacting to the countdown.
- Cities are the biggest heat source — factor their heat radius into capture order, not just their Rare Soil output.
- Firebomb and Recon Planes are alliance-rescue tools: coordinate who carries them before Blizzard events.
- Bases cool while troops are deployed — avoid ending long cold-zone marches right as a Cold Wave lands.
| Heat Source | Heat Contribution | Cost / Notes |
|---|---|---|
| High-heat Furnace (normal) | 5.5°C at L1 up to 20°C at L30 | Burns Coal continuously |
| High-heat Furnace (Overdrive) | 8°C at L1 up to 30°C at L30 | Burns 4x Coal — reserve for emergencies |
| Alliance Furnace (in radius) | Extends shared heat to nearby members | Members reinforce upgrades; R4/R5 deploys |
| Captured Cities | 5°C at L1 up to 60°C at L6 | Highest single source; adjacency only |
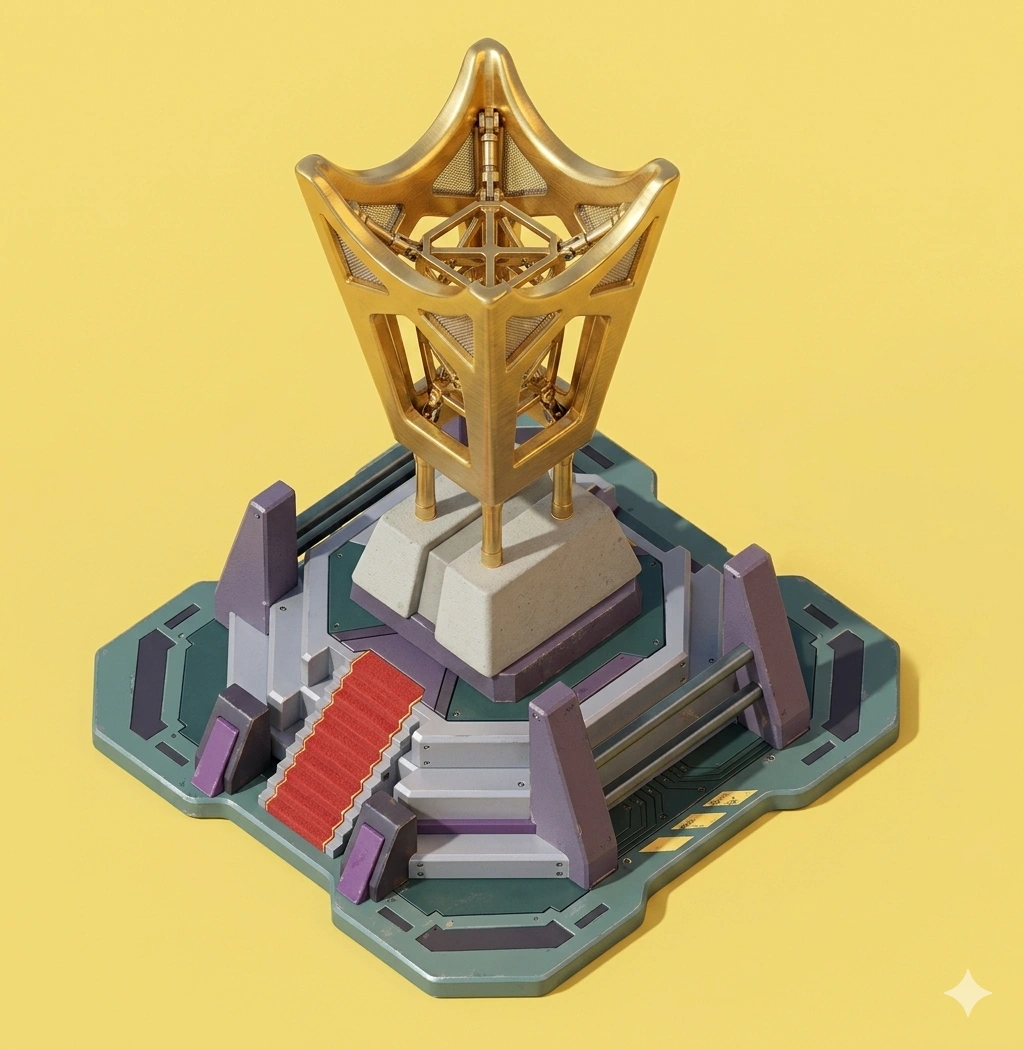
| Tower of Victory (decoration) | L1: +3°C, L2: +4°C, L3: +5°C (caps) | Bought in the Season 1 Black Market |
| Recon Planes | Up to 60°C boost | Allies can send them to your base |
| Firebomb (profession skill) | +45°C in a 9x9 area for 5 minutes | 23.5-hour cooldown, Level 3 skill |
| Intense Overdrive (profession skill) | +2°C bonus to Overdrive heat | Level 1 perk |
| Nuclear Furnace (warzone objective) | +10°C warzone-wide when reactivated | Collective warzone effort, not alliance-owned |
| Ally Coal donation | 100 Coal gives an ally +2°C | Cheapest emergency defrost; stacks across allies |
Part 4: Best Preparation for an Early Advantage
The preparation image focuses on one big truth: players who enter Season 2 with a plan snowball much harder than players who react after the season starts. If you spend, the most impactful paid acceleration mentioned in the image is the Season 2 Battle Pass, Weekly Pass, and Coal Pack because they speed up your opening Furnace pace and resource flow.
The image also highlights three preparation ideas that matter even for lighter spenders. First, buy Violet, Mason, and universal Epic shards from stores before or during the opening stretch if you plan to use UR upgrade events efficiently. Second, preserve Hero Return Tickets instead of wasting them late in Season 1, because even a small amount of Coal or Titanium Alloy in the first days of Season 2 creates meaningful momentum. Third, ask your alliance leadership to prioritize the alliance tech Veteran Craftsman so seasonal building costs drop across the whole alliance.
There are also two account-value notes in the image worth treating as optional optimizations rather than mandatory rules. The Ice Castle Base Skin helps at high temperatures and adds combat stats, while the Tower of Victory decoration adds extra temperature points as it levels. These are useful, but they matter less than resource discipline and Furnace progression. The highest practical value callout is still Violet: once your Furnace reaches Level 30 and Violet is already at 5 stars, you can promote her to UR, after which she resets to 3 stars and returns 350 Violet shards plus refunded ability points when applicable.
- Save or redirect account value toward Violet, Mason, universal Epic shards, and Hero Return Tickets if you want a stronger Season 2 opening.
- Ask R4 and R5 leaders to prioritize Veteran Craftsman because seasonal building discounts help the whole alliance.
- Treat Violet UR as one of the most important long-term Season 2 hero milestones once your Furnace reaches Level 30.
Part 5: Featured Season 2 Unlock Visuals
The same Season 2 tip sheet also highlights three visual milestones that players care about early: the Ice Castle Base Skin, the Tower of Victory decoration, and the UR Violet promotion moment. These are not the core reason you win Season 2, but they are useful visual reference points for understanding which optional boosts, cosmetics, and progression spikes the early-season community tends to value.
The Ice Castle Base Skin is presented as an optional purchase with utility at high temperatures plus a small attack and defense boost. Tower of Victory is shown as a decoration that improves temperature by level, making it part of the broader heat-management conversation. Violet's UR promotion is the biggest gameplay upgrade of the three because it is tied directly to Furnace Level 30 and one of Season 2's strongest hero progression spikes.
- Ice Castle Base Skin is an optional premium utility and stat item, not a mandatory progression requirement.
- Tower of Victory supports temperature management and becomes more useful as its level increases.
- UR Violet is the most impactful of the three because it changes real combat strength, not just convenience.


Part 6: High-heat Furnace — Your Number One Building
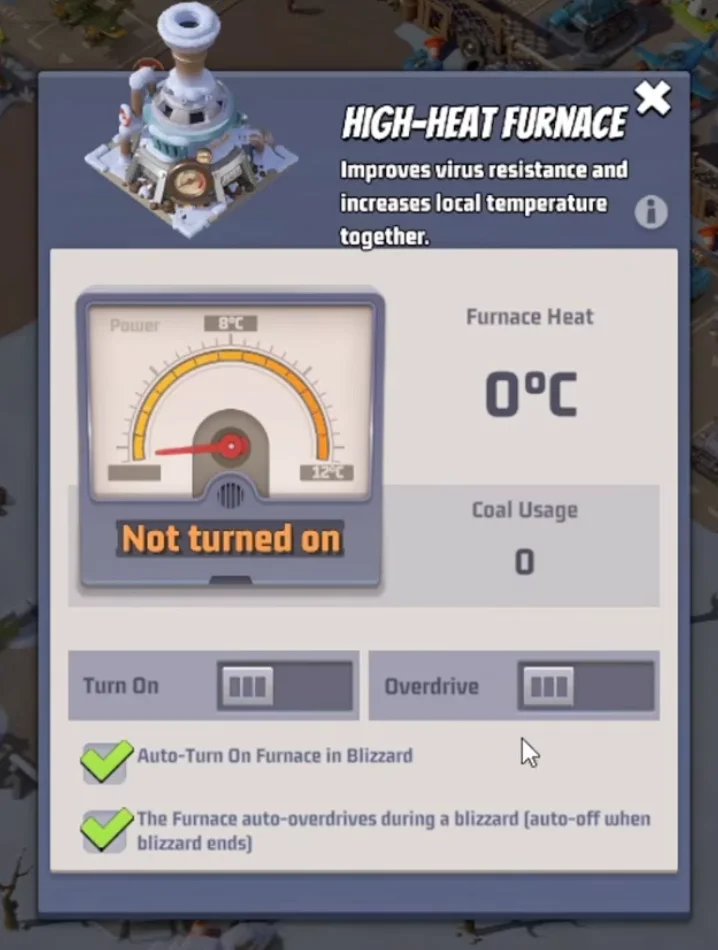
The High-heat Furnace unlocks at HQ 30 and provides base heat plus Virus Resistance. It is the single most important Season 2 building — every Titanium Alloy should go here first, because Furnace level gates both your survival in cold zones and your combat readiness through the Virus Resistance ladder.
Overdrive mode heats much faster but burns four times the Coal. Reserve it for Blizzard and Cold Wave events (to beat the freeze countdown), big rally pushes into cold zones, and Rare Soil War defense windows when you need maximum heat under attack. Turn on the 'Auto-turn on Furnace in Blizzard' toggle in the Furnace UI so the game protects your base when you are offline.
Reaching Furnace Level 30 unlocks three hero-type military buildings that boost damage for Aircraft, Tank, and Missile squads — the late-game power ceiling. That is why the Furnace climb starts on Day 1 and never really stops.
- Every Titanium Alloy goes to the High-heat Furnace first — it is survival and Virus Resistance in one building.
- Overdrive burns 4x Coal: save it for Blizzards, cold-zone rallies, and Rare Soil War defense windows.
- Furnace Level 30 unlocks three hero-type military buildings — the late-game damage ceiling.
| Furnace Level | Titanium Alloy Cost | Power | Virus Resistance | Activation Heat | Overdrive Heat |
|---|---|---|---|---|---|
| 1 | 2,800 | 400 | 100 | 5.5°C | 8°C |
| 15 | 701,200 | 24,000 | 3,000 | ~12°C | ~18°C |
| 30 | 4,321,100 | 108,100 | 10,000 | 20°C | 30°C |
Part 7: Coal, Titanium Alloy, Rare Soil, and the Factory Chain
Titanium Alloy is your Furnace growth resource; Coal is your daily operating fuel for heating, factory construction, and ally heat donations. Do not treat them the same way: running out of Titanium Alloy stalls your growth, but running out of Coal breaks your survival and alliance support. Efficient players build daily routines for both.
Titanium Alloy Factories are the backbone of alloy income: each factory level adds +720 Titanium Alloy per hour, up to 21,600 per hour at Level 30. The unlock chain is the biggest trap of the season — Factory 1 is free, Factory 2 requires Factory 1 at Level 15, Factory 3 requires Factory 2 at Level 15, Factory 4 requires Factory 3 at Level 15, and Factory 5 is Weekly Pass only. One factory at Level 20 produces 14,400 per hour, while four factories at Level 15 produce 43,200 per hour — triple the output for the same investment window.
The correct order is: Factory 1 to Level 15, immediately start Factory 2; Factory 2 to Level 15, start Factory 3; Factory 3 to Level 15, start Factory 4; only then level them all evenly (all to 16, then 17, and so on). Coal costs accelerate sharply past Level 15 (Level 1 costs 700 Coal, Level 15 around 137,000, Level 30 around 359,300), so unlocking Factories 2 to 4 is the highest-return-on-investment Titanium move in Season 2.
On passes: the Weekly Pass is the higher-impact purchase because of Factory 5 (about +17,280 Titanium Alloy per day, roughly 20,000 Coal daily, stamina, speedups, and +250 Virus Resistance points weekly) — but if you stop renewing it you lose Factory 5's output, so only invest in Factory 5 while the pass is active. The Season Battle Pass is medium value: it adds two extra reward tabs to season tasks, so buy it if you play daily.
- Unlock all four Factories before pushing any past Level 15 — 4 x L15 beats 1 x L20 by 3x output.
- Stack cost discounts: Engineer profession Level 35 (Resource Saving, 5% off), alliance tech Veteran Craftsman, and tech Master Craftsman.
- Weekly Pass > Season Battle Pass if you only buy one, purely because of Factory 5.
| Resource | How to Get It | What It Is For |
|---|---|---|
| Coal | Dig Sites (hourly), Doom Walker first kills, radar missions, season pass, Distressed Survivor, Coal Pack | Fuel Furnaces (especially Overdrive), build Factories, +2°C ally heat donations |
| Titanium Alloy | Factories (+720/hr per level), zombie kills, season tasks and rewards | Upgrade the High-heat Furnace and late-season military buildings |
| Rare Soil | Cities (350/hr at L1 up to ~1,000/hr at L6), Dig Sites, Rare Soil War spoils | The scoring metric — season total decides final alliance rank |
Part 8: Day 1 Strategy and Opening-Week Optimization
The fourth and fifth images contain the most actionable opening-week advice. Start Season 2 with stacked radar missions if possible so you can look for a distressed survivor reward that grants Coal immediately. If your alliance spawn position is poor, or if hostile neighbors will block your pathing, relocating the alliance early can be worth it so you can route toward better Dig Sites and future Level 6 Cities.
The guide image also recommends planning your first Dig Site before random attacking begins. This matters because different mutant beasts have different weaknesses, and because your first Dig Site is not just a battle target. It unlocks steady alliance Coal. Another strong tip is to avoid doing Doom Walker content after reset on the day your server receives Season 2. Wait until Season 2 is active, then kill the highest level Doom Walker or seasonal PvE target you can clear for the first-kill reward. The same logic applies to smaller Zombies: always try to claim the highest-level first-kill rewards your account can safely manage.
Factory sequencing is another major optimization. The image recommends pushing each Titanium Alloy Factory only to Level 15 first, because reaching Level 15 unlocks the next factory. Once all base factories are unlocked, upgrade them in waves, such as all to Level 16, then all to Level 17, and so on. If you have the extra paid factory from the Weekly Pass, compare its upgrade cost before spending because that temporary factory may occasionally be the cheaper investment for short-term alloy output.
The second day-one image adds more advanced flow control. Use War Fever for actions that benefit from extra attack power. Build the Alliance Furnace immediately once available and keep it active because alliance goals and seasonal stability depend heavily on furnace uptime. Remember that rally participants benefit from the Virus Resistance of the rally leader, which is extremely useful for Dig Site captures and for helping lower-resistance players secure better first-kill rewards by joining stronger teammates.
Finally, watch for hidden claims. After a Furnace level-up, check Season 2 goals manually because reward notifications do not always show a red dot. The same warning applies to Blizzard and Cold Wave goal pages. Players often miss free rewards simply because the UI does not notify them clearly.
- Enter Season 2 with stacked radar missions and plan your first Dig Site target before random fights begin.
- Delay first-kill PvE actions until Season 2 is active so the reward pool includes Coal and other seasonal value.
- Unlock all Titanium Alloy Factories first by using the Level 15 sequence before pushing individual factories too far.
- Use stronger rally leaders to share high Virus Resistance with weaker members during first-kill and Dig Site pushes.
- Manually check Season 2 goals, Furnace rewards, and Blizzard reward pages because some claims do not show notifications.
| Hour | Action | Why |
|---|---|---|
| Hour 0 | Buy Season Pass + Weekly Pass; R4/R5 place the Alliance Furnace | Unlocks Factory 5, daily rewards, and the alliance heat hub in a friendly cluster zone |
| Hour 0-2 | Collect stacked radar missions | Bulk Coal from Distressed Survivor rewards |
| Hour 0-4 | Kill a high-level Doom Walker for first blood | Second Coal and Titanium bounty (the first was end of Season 1) |
| Hour 0-6 | Start Titanium Alloy Factory 1 | The Factory 2-4 unlock chain depends on Factory 1 reaching Level 15 |
| Hour 6-12 | High-heat Furnace Level 1 to 5 | Establishes a positive heat baseline for early operation |
| Hour 12-24 | Capture your first Level 1 Dig Site | Needs 4,000 Virus Resistance — pick high-Coal output adjacent to your start |
Part 9: Temperature Management, Recon Warming, and Blizzard Survival
Season 2 punishes players who ignore temperature details. The images repeatedly emphasize that you should do resource-heavy or objective-heavy actions before a blizzard arrives, because once your base freezes your options shrink and your efficiency collapses. Keeping your Furnace active is the foundation, but ally support matters too.
One tip in the image is especially practical: ask allies to send recon planes to warm your base up to 40°C when needed. This helps with some Season Battle Pass and seasonal heat-related targets, and more broadly it can stabilize your base before a dangerous weather window. The image also recommends unlocking the Season skill Intense Overdrive at level 40 for both Engineer and Warlord paths, because those extra degrees create a meaningful safety cushion.
Good temperature management is really about timing. Use your warm window to clear content, claim PvE rewards, upgrade key systems, and finish tasks before weather reduces flexibility. Then, when blizzards hit, focus on staying unfrozen and collecting the event rewards tied to survival and alliance cooperation.
- Do high-value actions before blizzards so you are not forced into low-efficiency recovery play.
- Use recon warming and Intense Overdrive to create temperature buffers before dangerous weather.
- Do not forget to claim Cold Wave and Blizzard goals manually after the event phase completes.
Part 10: Alliance Strategy, Dig Sites, and Map Control
The alliance strategy image highlights how different Season 2 feels from a purely individual progression season. One recommended approach is to feed early mining and key progression to the strongest member first so that player reaches higher Virus Resistance faster than the rest. That stronger account can then lead rallies, unlock better first-kill rewards, and help the alliance break through harder seasonal thresholds.
The image also reinforces the importance of Dig Sites. Capture them as early as possible because they provide hourly Coal for the whole alliance, and make sure members claim that Coal manually through Alliance -> Alliance Cities -> Dig Sites. Once you capture a City, the recommended follow-up is to capture all connected Dig Sites as quickly as possible, with the image noting a pace limit of two per day in that expansion flow.
The temperature map shown in the lower half of the image explains why route planning matters. Outer rings are warmer and safer, while the center drops through bands such as -30°C, -40°C, -50°C, -60°C, -70°C, and eventually -80°C. The deeper your alliance pushes, the higher the environmental pressure. This makes alliance movement, pathing, and capture order just as important as raw power.
- Use your strongest player as an early breakthrough tool if your alliance wants faster access to higher-threshold seasonal content.
- Capture Dig Sites quickly and remind members to claim the hourly Coal manually.
- Understand the thermal map before expanding because inner zones increase both survival cost and march pressure.
Part 11: City and Dig Site Capture Rules
Dig Sites replace Season 1's Strongholds, and both Dig Sites and Cities follow strict ownership and pacing rules. Both are capped at 2 captures per day, both require adjacency — a Dig Site needs an adjacent owned tile (except your first Level 1), and a City needs an adjacent owned Dig Site. The Virus Resistance ladder is the same system as Season 1 but with a higher floor, and the Mutant Beasts defending Dig Sites hit harder than Season 1 Corruptors.
The critical Season 2 difference is that there are no cross-warzone captures: Dig Sites and Cities can only be captured inside your own warzone. Season 1 outposts on other servers are gone, which makes route planning inside your own map the whole game.
The capture process itself is a race: the first alliance to reach 100 percent capture progress within 4 hours wins the objective, up to 10 teams can reinforce, and the defending Mutant Beast must be defeated before reinforcement begins. If nobody completes the capture in 4 hours, the attempt fails.
- Dig Sites need 4,000 Virus Resistance at Level 1 and 10,500 at Level 6 — check the ladder before rallying.
- Captures are limited to 2 per day per type, so plan the daily capture order as an alliance, not per player.
- Win the 4-hour capture race by defeating the beast first, then flooding reinforcement squads.
| Type | Max Owned | Daily Limit | Defender | Protection After | Adjacency |
|---|---|---|---|---|---|
| Dig Site | 4 | 2 per day | Mutant Beast plus polar creatures | 36 hours | Adjacent owned tile (or first L1) |
| City | 6 | 2 per day | Mutant Beasts | About 6 days | Adjacent owned Dig Site |
Part 12: Level Unlock Schedule
Higher-level Dig Sites and Cities unlock progressively across the first four weeks. Each level unlocks at the stated weekday plus 12 hours, so plan rallies around these gates — being ready the hour a new level unlocks is how alliances win the race for the best tiles before rivals can contest them.
- Mark each unlock in your alliance calendar and pre-rally so you hit new tiles the hour they open.
- Virus Resistance gating means your Furnace pace decides which unlock wave you can actually contest.
| Objective Level | Unlocks |
|---|---|
| Level 1 | Week 1, Day 3 + 12 hours |
| Level 2 | Week 1, Day 6 + 12 hours |
| Level 3 | Week 2, Day 3 + 12 hours |
| Level 4 | Week 2, Day 6 + 12 hours |
| Level 5 | Week 3, Day 3 + 12 hours |
| Level 6 | Week 3, Day 6 + 12 hours |
| Level 7 | Week 4, Day 7 + 12 hours |
Part 13: Mutant Beasts — Dig Site Defenders and Counters
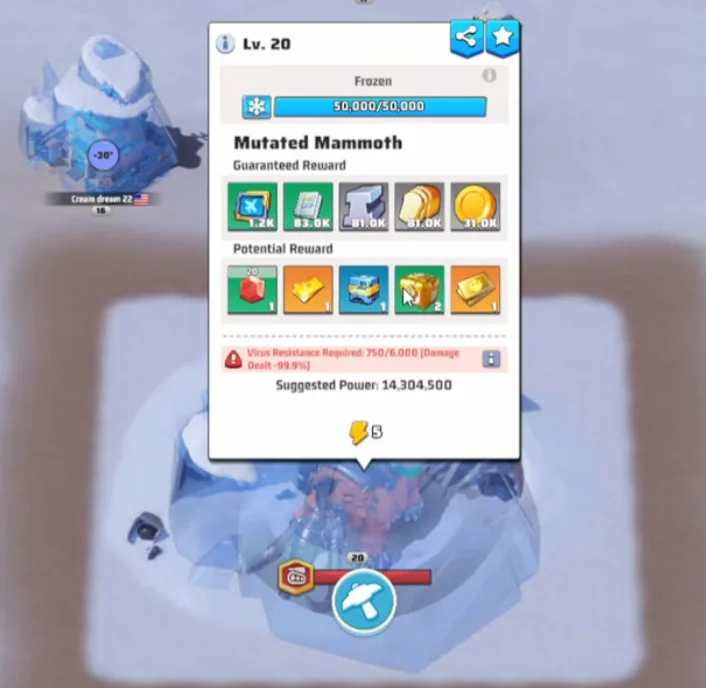
Mutant Beasts replace Season 1's Corruptors as Dig Site defenders. There are three types, and each follows the same counter triangle as PvP squad types, with a +50 percent damage bonus when you field the correct counter. Bringing the wrong squad type into a high-level Dig Site is the most common way alliances fail capture races they should have won.
- Scout the beast type before committing a rally — the counter bonus is worth more than raw power.
- High-level beasts suggest 10M+ power rallies with the correct counter type.
| Mutant Beast | Beast Type | Counter Squad | Damage Bonus |
|---|---|---|---|
| Gorilla | Aircraft-type | Missile squads | +50% damage |
| Bear | Missile-type | Tank squads | +50% damage |
| Mammoth | Tank-type | Aircraft squads | +50% damage |
Part 14: Rare Soil War — The Season-Deciding Event
Rare Soil War opens on Day 1 of Week 4 and runs 8 rounds total, two per week through Week 7. Each round has five stages: Waiting (24 hours), Declaration (24 hours), Invitation (12 hours), Preparation (30 minutes), and War (up to 40 minutes). During Declaration, R4 and above from the attacking faction declare war on alliances from the opposing faction — up to 3 attackers can pile onto 1 defender, and the target can change until the stage ends. During Invitation, the defender's R4 and above invite same-faction, same-bracket allies: 3 attackers means up to 2 defenders invited, 2 attackers means 1, and 1 attacker means none.
Matchmaking is bracketed. Within each faction, alliances are ranked by total Rare Soil into four groups — ranks 1-10, 11-20, 21-30, and 31-50 — and you can only declare on alliances in the opposite faction AND your own ranking group. Defense invitations obey the same-bracket rule too. Strategic implication: if your alliance pulls far ahead of your faction-aligned friends, you can land in different brackets and lose the ability to defend each other, so track the Rare Soil gap weekly if joint defense matters.
Victory goes to whoever destroys the defender's Alliance Furnace (0 percent durability) before the timer ends. War duration scales with the matchup: 1v1, 2v2, and 3v3 last 40 minutes; 2v1 and 3v2 last 30 minutes; 3v1 lasts 20 minutes. Winning attackers plunder up to 20 percent of the defender's accumulated Rare Soil — rising to 30 percent after the Rare Soil Showdown event later in the season.
- Rare Soil War is not random PvP; it is a scheduled two-round weekly system with fixed preparation windows.
- Attackers win with target planning and alliance coordination, while defenders win with early invitations and clean positioning.
- Everything you build in Weeks 1 to 3 is preparation for surviving and profiting from Week 4 onward.
| Day | Start | Duration | Phase | Action |
|---|---|---|---|---|
| Monday | Reset | 24 hrs | Waiting for Declaration of War | |
| Tuesday | Reset | 24 hrs | Declaration of War | Attackers pick attacks and allies. |
| Wednesday | Reset | 12 hrs | Invitation | Defenders secure help. |
| Wednesday | Reset + 12 hrs | 30 min | Preparation | Defenders position for war. |
| Wednesday | Reset + 12.5 hrs | Up to 40 min | War | |
| Thursday | Reset | 24 hrs | Waiting for Declaration of War | |
| Friday | Reset | 24 hrs | Declaration of War | Attackers pick attacks and allies. |
| Saturday | Reset | 12 hrs | Invitation | Defenders secure help. |
| Saturday | Reset + 12 hrs | 30 min | Preparation | Defenders position for war. |
| Saturday | Reset + 12.5 hrs | Up to 40 min | War |

Part 15: The Warlord Missile — Attacker-Only Superweapon
The Warlord Missile is a devastating skill exclusive to the player holding the Warlord title in the attacking alliance, usable during the Preparation and War stages of a Rare Soil War round. The target zone is inside the defender's Alliance Furnace catchment area; the launch origin is unrestricted, but the Warlord and the target must be on the same server.
Launching is a gamble. Activation starts a 180-second countdown during which the Warlord gains War Fever status: their base location is published to the entire server in world chat, everyone — including cross-server visitors — can attack the Warlord's base, and the Warlord cannot use a shield. If the Warlord's base moves or gets breached during prep, the missile fails and goes on a 72-hour cooldown. If it lands, it deals 30,000 durability damage to the defender's Alliance Furnace, and the 25x25 blast radius around the impact point forcibly teleports every base inside it to random world-map positions (shields are not broken) and becomes temporary Contaminated Land.
Attacking alliances should coordinate body-block defense around the Warlord and pre-position rallies before activation. Defending alliances should watch world chat for the enemy Warlord reveal — the 3-minute window is open season to pile rallies and abort the missile. And keep your Alliance Furnace durability buffer high during war windows, because 30,000 missile damage combined with normal attacker damage can zero a fragile Furnace instantly.
- Only the attacking alliance's Warlord title-holder can launch, and only during Preparation and War stages.
- The 3-minute prep publishes the Warlord's location server-wide with no shield — coordinate defense or pile-on accordingly.
- A landed missile deals 30,000 Furnace damage and force-teleports every base in a 25x25 blast radius.
Part 16: Factions, Nuclear Furnace, and Glacieradon Hunts
Season 2 retires Season 1's Capitol Conquest and Builder Alliance concepts. In Week 3, every alliance on the warzone is auto-split into two factions — Rebels and Gendarmerie — and from Week 4, Rare Soil War runs between the factions: alliances in the same faction collaborate, and opposite-faction alliances are matchmade for the 8 war rounds. The split criteria are server-specific, so confirm where your alliance lands as soon as Week 3 triggers. There are no Builder Alliances in Season 2 — the only alliance-level facility is the Alliance Furnace, deployed by R4/R5 on Day 1.
The Nuclear Furnace at the center of the map (a Level 7 tile) is not a capturable prize like Season 1's Capitol — it is a collective warzone objective. The activation mission opens in Week 4 (Day 6 + 36 hours per most sources; some in-game schedules show Day 3 + 36 hours, so verify on your server). Every alliance sends troops to fill a shared reactivation bar — each squad costs 5 stamina — and when it completes, the Nuclear Furnace grants +10°C base heat warzone-wide to every base on the map. Faction Rewards scale with your personal contribution and your faction's overall performance.
Glacieradons are the season's raid bosses: 4 spawn in total, one per day after the Nuclear Furnace event begins, each starting at a map corner and walking through Cities toward the Furnace. You cannot attack them while they move — wait until one reaches a City. Each player gets 5 attacks per day per server, and while a Glacieradon lives it reduces Furnace progress by about 1 percent every 4 hours. If one captures a City, that City turns neutral and protected, so kill them before they arrive.
Glacieradon hunts are one of only two cross-server mechanics in Season 2: same-faction commanders can hop to other warzones and attack their Glacieradons with a fresh 5-attacks-per-day quota on each server — hopping to N servers means 5 times N attacks per day, and every kill counts toward your personal Faction Reward tier. Coordinate a daily cross-server rotation with faction-aligned allies to burn every quota.
- Week 3 faction split (Rebels vs Gendarmerie) decides your Rare Soil War opponents — scout the brackets immediately.
- The Nuclear Furnace is a shared warzone objective: send squads (5 stamina each) to reactivate it for +10°C warzone-wide heat.
- Attack Glacieradons only after they stop at a City, use all 5 daily attacks, and hop servers for fresh quotas.
Part 17: Heroes and Exclusive Weapon Timeline
Violet is the headline hero story of Season 2: she promotes from SSR to UR, gaining +5 percent damage reduction that stacks with Murphy's damage reduction for a combined defensive wall. Wait for a VS hero day to do the upgrade so you double-dip on VS points.
Season 2 also introduces three exclusive weapons on a fixed timeline: Murphy's exclusive weapon releases on Day 4, Carlie's on Day 18 (strengthening Aircraft squads), and Swift's on Day 39. Missed weapons can be re-acquired later through the Black Market. The opening days are dense with free hero value: Day 1 brings Legend Returns (McGregor free), the Hero Tavern (Schuyler and Williams free), and Hidden Treasure (Marshall, Williams, and Schuyler shards); Day 3 brings the Weapons of Legends tavern event with shards for Kimberly, DVA, and Tesla.
- Promote Violet to UR on a VS hero day for double value, and pair her with Murphy for stacked damage reduction.
- Budget for the three exclusive weapons on Days 4, 18, and 39 — missed ones return via the Black Market at a worse rate.
| Season Day | Unlock |
|---|---|
| Day 1 | Legend Returns (McGregor free), Hero Tavern (Schuyler + Williams free), Hidden Treasure shards |
| Day 3 | Weapons of Legends tavern event (Kimberly, DVA, Tesla shards) |
| Day 4 | Murphy exclusive weapon |
| Day 18 | Carlie exclusive weapon (Aircraft squad) |
| Day 39 | Swift exclusive weapon |
Part 18: Full Week 1 to Week 8 Season 2 Roadmap
If you want the fastest mental model for Season 2, think of it as an eight-week funnel. Week 1 is about learning Polar Storm, building the Furnace, and stabilizing Coal and Titanium Alloy. Week 2 is about reward optimization through Polar Dishes, Beast Crisis, and better roster management. Week 3 is your major hero spike week, especially if you are preparing for UR Violet.
Week 4 is the turning point where Rare Soil War and much harsher blizzards begin to dominate decisions. Week 5 layers on Giant Glacieradon and Nuclear Furnace participation, which test stamina management, faction mobility, and hospital discipline. Week 6 raises the Rare Soil stakes further with stronger showdown pressure and larger plunder consequences.
Week 7 is the final active push, where the environment becomes even harsher and faction conflict peaks. Week 8 is the settlement phase, where alliances review contribution, assign rewards, and claim final season loot. The reason a total guide matters is that mistakes in Week 1 usually do not stay in Week 1. They echo forward into every later week where Rare Soil and alliance rank matter more.
- Weeks 1 to 3 are your growth and preparation window.
- Weeks 4 to 7 are your conflict and conversion window where preparation becomes Rare Soil results.
- Week 8 is your settlement and reward window, so the whole season should be played with final ranking in mind.
Part 19: Pre-Season 2 Preparation Checklist
What you do in the final days of Season 1 determines how hard your Season 2 opening snowballs. Work through this checklist before the new map opens: every item either converts directly into Day 1 resources or removes a bottleneck you cannot fix retroactively.
Two items deserve special emphasis. The Tower of Victory decoration from the Season 1 Black Market grants a permanent base temperature buff that carries into Season 2 — buy it before the season flips, because the shop closes. And two first-blood rewards are possible around the transition: kill a high-level Doom Walker right before the Season 1 reset, then again right after Season 2 starts, banking both bounties.
- Buy Violet shards and survival shards in Season 1 events while they are still cheap.
- Research the alliance tech Veteran Craftsman — it reduces Season 2 building costs for the whole alliance.
- Do not spend all Hero Return Tickets — keep some for Season 2 needs.
- Purchase the Tower of Victory in the Season 1 Black Market for the permanent temperature buff.
- Stack radar missions for Season 2 Day 1 — you need a Distressed Survivor task to spawn (it rewards Coal).
- Scout your first Dig Site target — a high-Coal-output Level 1 site adjacent to your start saves days.
- Claim two Doom Walker first bloods: one right before the Season 1 reset, one right after Season 2 starts.
- Push the Engineer profession to Level 35 for Resource Saving — 5 percent off building costs (Coal included).
- Buy the Coal Pack if available — your Day 1 Coal stockpile decides your first 48 hours.
- Renew friendship pacts with Season 1 allies and confirm in writing that they will answer your Rare Soil War defense invitations.
Part 20: Final Season 2 Advice for Serious Players
The seven images together tell a consistent story: the best Season 2 players are not just the strongest spenders or the fastest tappers. They are the players and alliances that understand sequencing. They know when to save tickets, when to spend Coal, when to upgrade the Furnace, when to let the strongest member break thresholds first, when to claim Dig Site income, and when to prepare for war instead of improvising after it starts.
If you want one Season 2 rule set to remember, keep it simple. Build Furnace strength early. Respect Virus Resistance checks. Route your alliance for Dig Sites and Cities with the thermal map in mind. Claim first-kill rewards efficiently. Use stronger rally leaders to carry weaker members through key thresholds. Enter Rare Soil War with a plan, not just enthusiasm. That approach will outperform a lot of accounts that look stronger on paper but waste their season in scattered decisions.
- Sequence matters more than panic spending or random aggression in Season 2.
- A strong alliance with clean Dig Site, Furnace, and Rare Soil discipline can outperform stronger-looking but disorganized alliances.
- Use this overview as your starting point, then jump into the specific Week 1 to Week 8 guides when you need deeper detail.
Keep reading